12 Tips to Help You Become Better at Off-Trail Travel
Adventure begins at the edge of your comfort zone.

For those type II fun adventure junkies out there like me, there comes a point when your old adventures start to feel routine and you’re hungry for more of a challenge. I wrote an article a while back on this theme. This time around, I thought I would go into more detail on one particular point from the first article – namely off-trail travel. Incorporating more, true backcountry routes into my trips (without a GPS) has been a big focus for me lately and added a lot of excitement to my adventures. So I thought I would share some tips and tricks I have learned in the process.
As a word of caution, you should only consider off-trail travel if you have already mastered basic backpacking. There is considerably more risk going where you won’t run into other people on the trail should you need help. I am not an expert and claim no liability for any consequences resulting from the advice in this article (let’s just get the legal jargon out of the way haha). However I do hope it helps spark some ideas and motivation to research further for those of you who are interested! So let’s get to it.
1. Don’t forget your Leave No Trace Principles
If you only learn one thing from this article, know this – just because you aren’t on a heavily trafficked trail doesn’t mean you can disregard everything you learned about LNT. In fact, being without a proper trail means you need to be extra vigilant about doing the right thing when it comes to selecting a durable campsite pad, avoiding trampling delicate alpine meadows, and everything else that comes along with LNT.
2. Study up on hiking blogs and forums
The best way to learn about off-trail routes is to read about people who have actually done them. Often forum threads will have detailed descriptions and pictures of the suggested route. Some good websites for this are NWHikers.net, backpackinglight.com, and summitpost.org. If you look hard enough, chances are you’ll also come across blogs by other adventurers like yourself with good information. For our Alpine Lakes Wilderness high route this summer, my brother and I stumbled upon one blog with trail photos, a satellite image with the route drawn in, and even a video!
3. Know your drainages
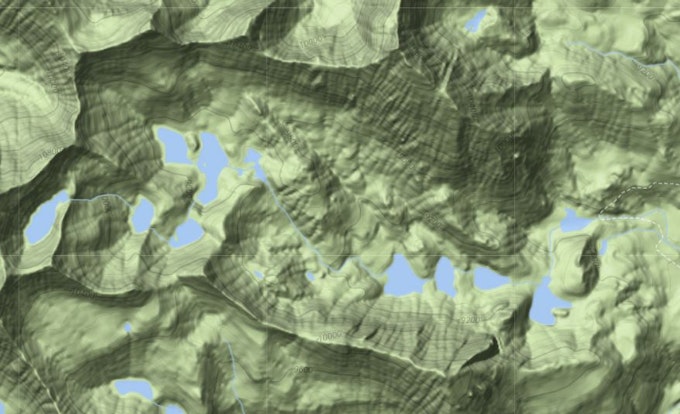
Water flows in very predictable ways in the mountains, and having this knowledge in the back of your mind as you are planning routes or navigating can be invaluable. Before going out, make sure you have a good mental image of which lake flows into which, how the creeks move between them, and which valleys you are aiming to go up (or down). For example, in the above screenshot the trail only extends as far as the lowest lake in the drainage (far right). Say instead that you wanted to camp at the 8th or 9th lake. It seems like a long ways to go without a trail, but looking closely you can see it wouldn't be terribly difficult to hop from one lake to the next just following the flow of water. After all, each lake (until you get to the upper basin) is sequentially in order with no branching in their outflows, and the entire time you'll have two very steep ridgelines to the north and south to help guide you in the right direction.
In a more general sense, this advice could be summarized as “be familiar with your terrain”. Obviously water is scarce in desert environments, so if that’s your home playground then creeks and lakes don’t quite apply. Having spent most of my time hiking in the alpine terrain of the Cascades and Rockies, I can’t intelligently comment on what the comparable strategy would be in the desert, but I am sure similar patterns start to emerge for people who spend enough time in that terrain. To me, that’s one of the things that makes off-trail navigation so fun – you really get to become an expert in your local (or preferred) kind of terrain!
4. Google Earth and Caltopo are your best friends
Getting an idea of lakes and drainages is substantially easier when you have awesome tools like Google Earth and Caltopo at your fingertips. I make it a habit to do a “fly over” of any off-trail routes I am going on a couple of days before the actual trip. It really helps cement that mental map in your head. Another tactic is to use the satellite images (available in either program) to look for signs of social trails that may not be marked on the official map, but can still come in handy.
5. Keep the scrambling reasonable with slope shading overlays
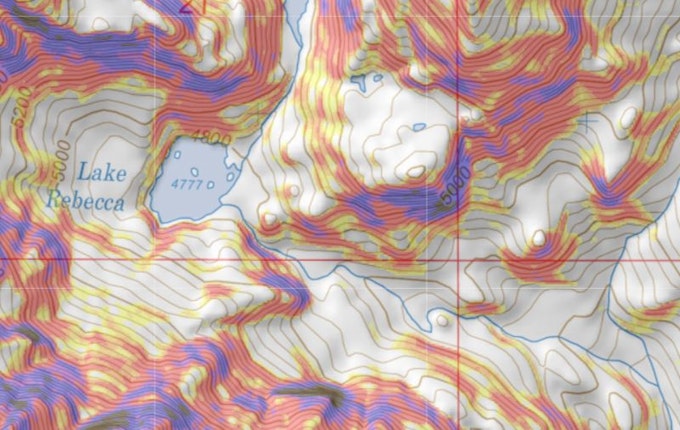
One particularly useful feature on Caltopo is the slope angle shading overlay (available as a checkbox in the layers panel). Just looking at satellite images it can be difficult to get a sense for how steep certain portions of your route may be. Especially when working your way along ridgelines and over saddles, it’s nice to have looked ahead of time and identified which path will keep you on the shallowest slopes possible. As you complete more trips, you can start to develop a sense of your personal limits by recording the slope angles you scrambled on your last trip and how comfortable you felt.
6. Understand compass bearings and triangulation
A bit of a no-brainer – of course you should have a good sense of direction and feel comfortable following bearings on a compass. Even though you cannot always apply triangulation techniques, when you can they are great to know. To increase the likelihood that you will be able to triangulate your position, it’s good to familiarize yourself with the major peaks in the area and what they look like from different directions.
7. Take time to survey your surroundings at viewpoints
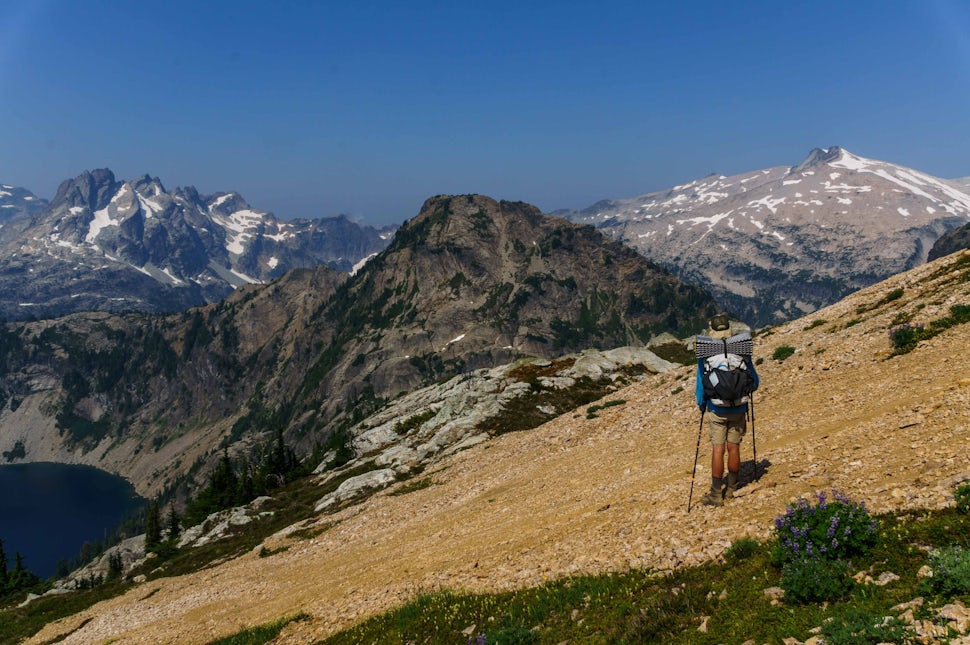
Regardless of what preparation you do before your trip, no information is as valuable as looking at the real thing with your own two eyes. Especially from a good vantage point where your view isn’t obstructed by trees like it often is on the trail. At each saddle, peak, etc. I always take a short break, pull out my map, make sure everyone in the group is oriented and on the same page, and then devise a game plan for the upcoming section. If you have any doubts about which valley you’re supposed to be going up or which saddle you’re aiming for, make sure these are cleared up BEFORE you head down into the trees again. Questions like these are much easier to sort out up above.
8. Pack an altimeter watch
Many watches on the market offer an altimeter feature that estimates your elevation using the local air pressure. When you are confused where you are on the topo map, being able to at least run your finger along a contour line of a certain elevation is very useful.
9. Be OK not knowing exactly where you are
For newcomers to off-trail travel, this will be one of the most difficult things to adjust to. You’re used to having a trail to follow and feeling lost can be quite scary. Now, there’s a big difference between truly being lost and just not knowing exactly where you are. Whenever I’m off-trail, I can always always always point on a map and show someone the general area I’m in. For instance, somewhere along creek X between lakes Y and Z, or in valley A approaching saddle B, on ridgeline C approaching peak D … you get the point. You need to start thinking more about terrain features and your location relative to them and not obsess over what your exact GPS coordinates are. Yes, you might not take the most efficient route without meticulously sticking to some pre-determined waypoint coordinates, but as long as you understand the major peaks around you, which drainage you’re in, what you expect the trail conditions to be like up ahead, etc. it is pretty difficult to get truly lost.
10. Find a partner with some experience
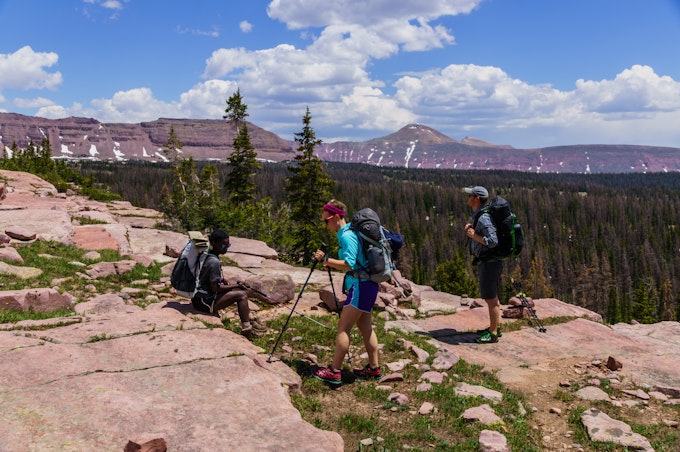
There’s no better way to help ease you out of your comfort zone than tagging along with someone more experienced than yourself. So make some friends in your local hiking group or next time you’re out on the trail!
11. Have a backup plan (or two, or three)
If you’re new to an area, often it is hard to know for sure whether a route is going to work out ahead of time. You might be 90% sure that a given saddle is safe enough to scramble, but once you’re standing at the base of it, it could be a very different story. In these situations, it is important first and foremost to be OK saying to yourself (or your partners) “let’s turn around, this doesn’t seem as safe as we thought.” Maybe you miss out on a pretty lake, but a trip is no good if you don’t make it back to the car. Secondly, from all of your planning you should be able to anticipate which parts of the route are likely to give you the most trouble. Knowing this, you can pre-plan alternate ways to get back to the car if the original route fails. Of course, always let someone at home know what your primary and backup plans are since you likely won’t have cell service off-trail, and make sure you consider the amount of food needed to retrace your steps. Especially for newcomers, this is one of the best ways to feel more confident about your first off-trail trip.
12. Get ready for some real peace and quiet
As trails get more crowded and social media and the internet continue to proliferate all kinds of information about parks and hikes, it can be hard to find some space to yourself even while backpacking. However, if you’re willing to put in the extra effort, serious off-trail trips can be the perfect way to finally have a lake all to yourself, and often it will be one that your friends back home have never even heard of! All the better :)
We want to acknowledge and thank the past, present, and future generations of all Native Nations and Indigenous Peoples whose ancestral lands we travel, explore, and play on. Always practice Leave No Trace ethics on your adventures and follow local regulations. Please explore responsibly!
Do you love the outdoors?
Yep, us too. That's why we send you the best local adventures, stories, and expert advice, right to your inbox.


