
14 Tips for attempting your first 14er
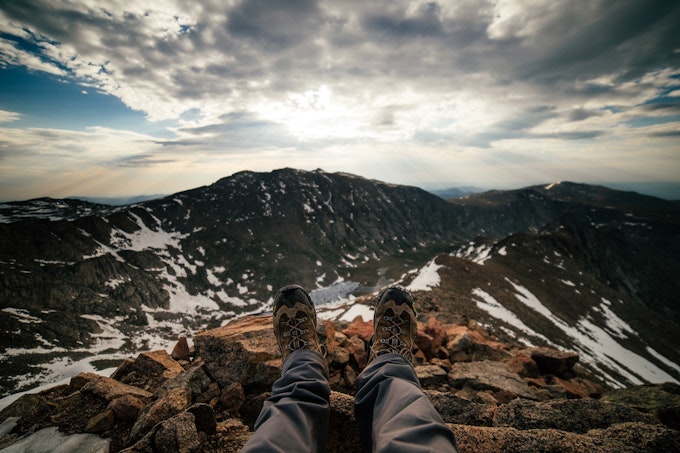
14,000 feet is the place to be
The idea of hiking 14ers has risen in popularity to become a common bucket list item for adventure enthusiasts. Many crave the accomplishment and stellar views from a peak rising 14,000 feet. Yet, the steep climbs, low oxygen levels, and rugged terrain can be nerve-wracking. If you dream of completing your first 14er but aren’t sure where to start, read on for some of the best advice I learned after hiking my first 14er.
Prepping for the trip
First things first: With a plethora of peaks over 14,000 feet to choose from, it's important to pick the best option for you and the best time of the year to go.
1. Choose when to hike
Summer is usually the safest time to hike 14ers. Due to high elevations, there is often a small amount of snow and ice on the peaks even at the height of the warm season. Trying to hike these trails any other time of the year can be considerably more challenging due to increased snow, ice, and wind.
If you choose to go during the off-season, I recommend doing a lot of research in advance. Come prepared with technical equipment like avalanche gear, snowshoes, and microspikes to traverse the icy terrain.
2. Pick the right peak and nearby lodging
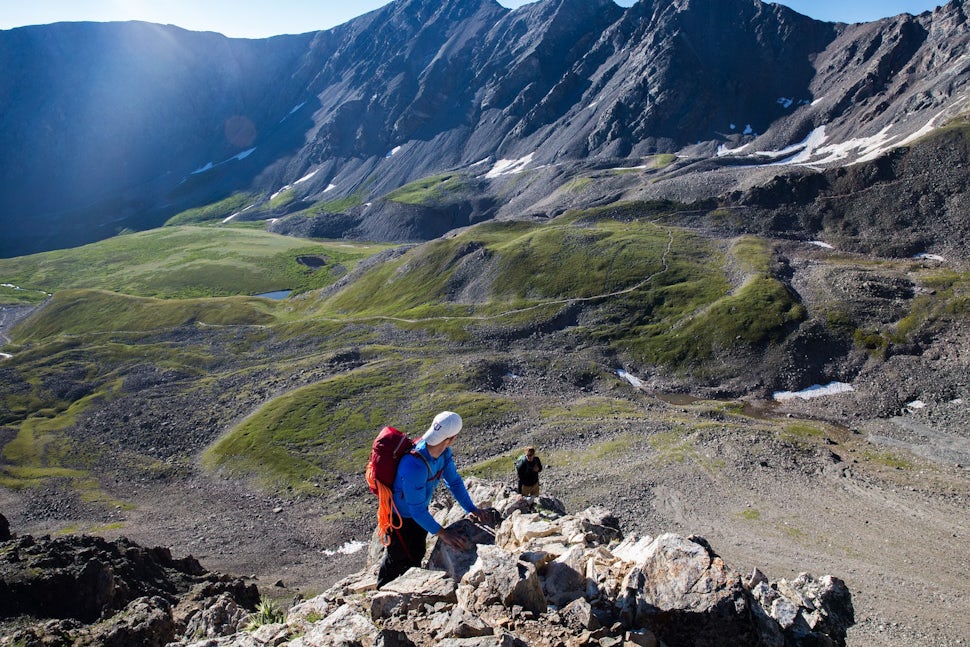
While all 14ers are fairly strenuous, some are considered easier than others. For your first 14er, pick a peak that is regarded as more beginner friendly, like Mount Evans or Pikes Peak. Each have roads to the top, allowing you to climb to the peak and then meet someone at the car if you want to skip the descent. Some 14ers feature several routes, so look for class one and two. Class three and four entail vertical climbing and more exposure, making them more challenging.
Finally, I would consider crowds when picking the right peak for you. While many 14ers have grown popular, some are busier than others. Mt. Bierstadt, Grays Peak, Torreys Peak, Quandary Peak, and Mt. Sherman are some of the most popular 14ers. Plan to go on a weekday to beat some of the crowds.
Attempting a 14er may require staying nearby overnight. Close lodging allows you to get an early start on your climb and try to avoid the common afternoon thunderstorms. Staying close to the peak also makes it easy to get back and rest after the climb when you're exhausted. I arrived early the day before all of my 14ers to ensure I would get a camping space, and it was so nice to just wake up and go.
You should also consider the road conditions where you'll stay before your attempt. Some roads up 14ers require four-wheel drive and high clearance, so make sure your vehicle can handle the environment.
3. Take practice hikes
Getting acclimated to the altitude gain and steepness of the hikes will be so helpful when attempting your first 14er. I recommend going on several hikes with a fair amount of altitude gain beforehand. If you don’t already own some sturdy hiking boots, buy some and use these practice hikes as an opportunity to wear them in and make sure they fit.
4. Download the Outbound app for offline navigation
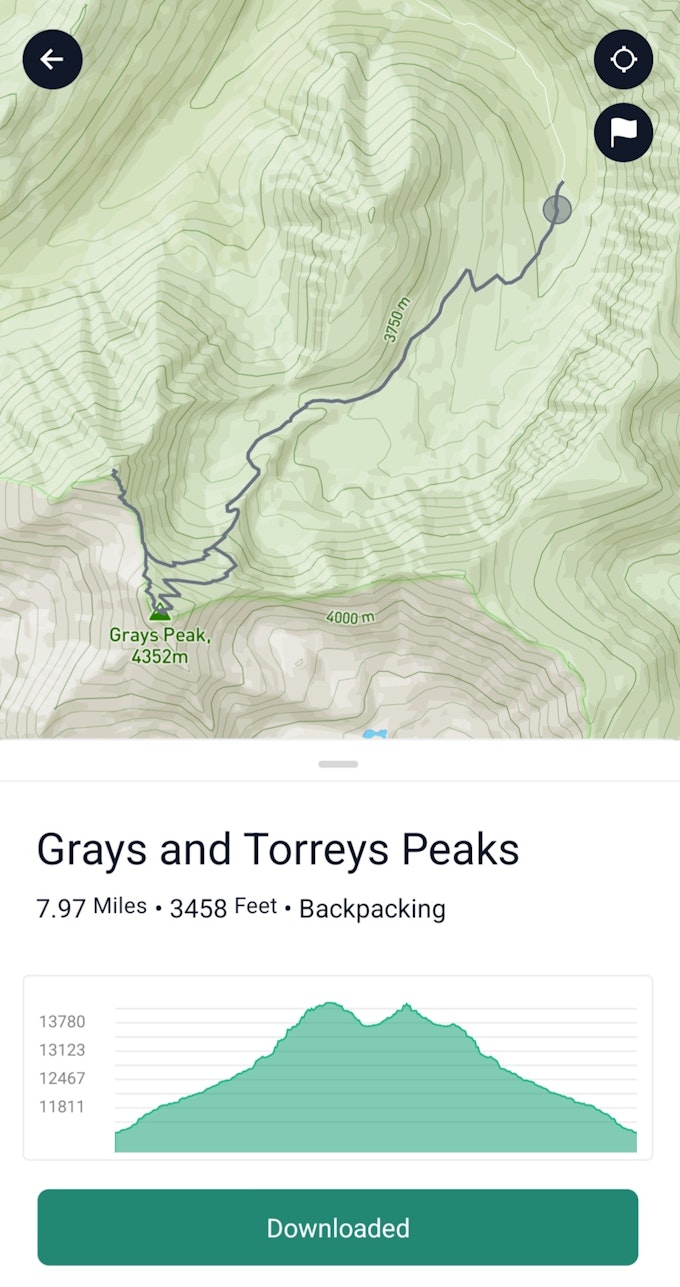
You will likely not have service on many of these hikes. Prepare ahead of time by downloading an offline map so it won't matter if you're out of range. Bring a topographical paper map as backup. Sometimes you may need to start a 14er attempt in the dark, so having a digital offline map can be essential and convenient.
5. Hydrate and eat right the day before
Hydrating the day before a big hike is just as important as drinking during the adventure. I recommend drinking 3 or 4 liters of water the day before. Hydrating ahead of time helps reduce digestive issues and headaches and is essential for long and strenuous activities like this.
You must also eat well the day before to optimize your energy. Enjoy meals high in nutritious carbs such as whole grain pasta, rice, or potatoes as these will slowly convert into energy your body needs for the trek.
The morning of your hike
6. Wear worn-in boots and moisture-wicking clothing
Make sure you have comfortable, sturdy hiking boots that won’t hurt your feet. These hikes have rough terrain that strains your body, so it is essential to have good equipment that fits.
I also recommend wearing synthetic clothing instead of cotton and having insulated and fleece layers. Even if you feel pretty warm at the start, once you are above the tree line and at the peak, it will get pretty windy and cold. You will also sweat a lot, so having quick-drying and wicking clothing is essential to avoid getting cold at the top.
7. Pack your day pack
Regular school backpacks can strain your back and potentially shorten your hike. Getting something with a hip belt can mitigate back, neck, and shoulder aches and make your hike much more pleasant. Look for one that holds 30-45 liters to provide plenty of room for necessities.
Essential Items
-Layers: You will likely start at colder temperatures and need to wear layers that you can remove as the day warms. Make sure there is room in your pack for all the clothing you'll need. If you are wearing shorts, bring a pair of pants in case you get too cold at the peak. You should also have a fleece jacket, a thicker insulated jacket, a hat, and gloves. Temperatures drop toward the top, and winds can pick up quickly. Bring more layers than you expect to need.
-Water: Pack more water than you think you should have. Even the 14ers with shorter mileage gain rapid elevation and are fairly steep, so you get thirsty and tired pretty quickly. Some people follow the rule of bringing one liter of water for every hour you hike. I usually pack 3 to 4 liters minimum. Know yourself and how much you drink on hikes to best prepare. There are not always streams or snow to refill your water supply (especially as you get closer to the peak), so keep that in mind when deciding what to bring.
-Snacks: Snacks are your best friend. They will help you maintain energy and boost morale. Whether you want to sit down, have a nice break, or snack while you hike, bring a lot of options. The best snacks will have plenty of protein, carbs, and healthy fats, such as trail mix, peanut butter and jelly sandwiches, dried fruit, bananas, peanut butter crackers, beef jerky, and protein bars. Consider weight, but overpack snacks to stay fueled.
-First Aid Kit: Always come prepared with basic medical equipment such as band-aids, gauze, medical tape, Moleskin, backup medications, ACE bandages, ice packs, antibiotic ointment, and antiseptic wipes. Many great resources provide lists of recommended items for a hiking first aid kit. Purchase a pre-made kit at any outdoor store and personalize it with additional items for your needs.
-Flashlight/headlamp: You may be hiking in the dark, so I recommend a headlamp for a hands-free experience. You never know when you'll end up out past sunset, and having a light can be a lifesaver.
-Sunscreen and sunglasses: Sun protection is essential at high elevations. Wear sunglasses, apply sunscreen before you start, and reapply throughout the hike.
Optional items: A cardboard 14er sign (many people make theirs with the peak name and number of feet for summit pictures), a camera, trekking poles, a helmet, hand warmers, and a lightweight shovel.
8. Maintain energy and hydration
Everyone is different. Finding the right balance of food for you is important. You want to get enough energy without overeating and feeling bogged down or sluggish. Eat good protein and carbs in the morning before heading out. Keep in mind you may not want to cook during an early start. My go-to quick breakfast is peanut butter bread with sliced bananas on top. Granola bars, dried fruit, oatmeal, and eggs are all great options.
I recommend drinking at least a liter before starting your hike. Trust me, frequently peeing while on-trail is better than not being hydrated.
9. Take pain meds ahead of time
If you have any preexisting pain areas that you know will likely flare up on your trek, taking some preemptive Tylenol or Ibuprofen to prevent pain doesn't hurt. If you know you're prone to altitude sickness, take altitude medications beforehand. Consider talking to your doctor weeks before your 14er about getting prescription meds to address nausea, headaches, dizziness, and fatigue some people get at higher elevations.
I get sports-induced migraines that flare up on pretty much any hike and last for hours to days. I struggled to reach the top of my first 14er, Mt. Elbert, because I was getting so dizzy from my migraine. The next time I did a 14er, I made sure to wake up earlier than my friends so I could sit there, sip water and let some medicine kick in. Drinking a full Nalgene, eating a good breakfast, and taking meds beforehand really reduced the pain and made my migraine more bearable during the hike.
10. Get an early start
One of the biggest dangers with 14ers is how rapidly the weather can change, and lightning storms can roll in. Hikers are defenseless against lighting, so it's essential to wake up early enough to get off the mountain by noon when afternoon storms typically roll in. Calculate your general hiking speed and time the attempt based on the mileage.
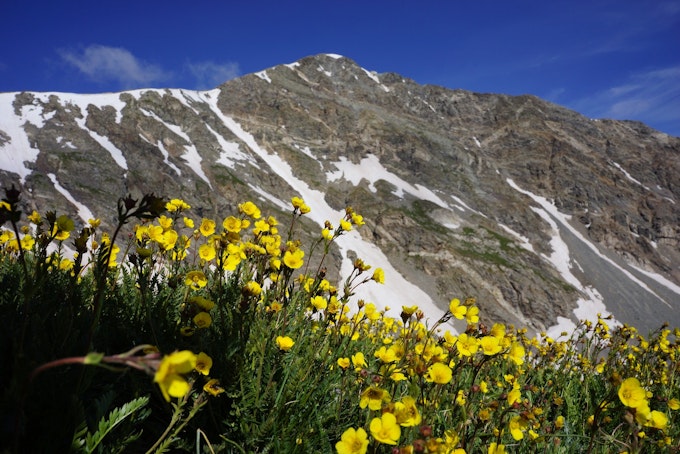
If you need to know your hiking speed, a good and safe estimate is about one mph. Some 14ers may require you to wake up at two or three in the morning. This was honestly my biggest reservation when considering doing a 14er. I am not a morning person and didn’t want to make myself miserable. However, while the initial wake-up can be difficult, once you are up the excitement and anticipation tend to take over. Plus, nothing beats the views that come with being above tree line at sunrise.
During the hike
11. Go slow.
If it is steep on the way up, it will be just as steep on the way down. Make sure you go slow and steady during the descent to minimize your risk of injury.
12. Beware of false summits.
Mt. Elbert had two false summits before finally reaching the peak. For me, getting to the first false summit only to realize there was more to go was the worst. Mentally prepare yourself for this possibility and research ahead of time, so you don't get caught off guard.
13. Slow and steady wins the race.
Push yourself but don’t overdo it. It is okay to go slow and take breaks. It is also okay to move quickly if that works for you. Listen to your body, set a positive mentality, and take time to appreciate the fresh air and beauty surrounding you throughout the hike.
14. Be kind to yourself.
When I was doing my first 14er, I felt a lot of internalized pressure because of things like other people being able to hike faster or fear that I wouldn’t make it to the summit and would feel let down. There was even a guy hiking barefoot up the mountain. When you are tired and worn out and get passed by a guy without shoes, that can definitely be a spirit dampener. Just remember that everyone is at a different skill level, altitude impacts everyone’s bodies differently, and at the end of the day, it is okay whether you summit or not. The fact that you are attempting a 14er is so rad and should be celebrated no matter what.
Now that you are an expert on how to prepare for your first 14er, start planning away and get ready to hike that peak. Happy trails!
Cover photo by Jeff Richards.
We want to acknowledge and thank the past, present, and future generations of all Native Nations and Indigenous Peoples whose ancestral lands we travel, explore, and play on. Always practice Leave No Trace ethics on your adventures and follow local regulations. Please explore responsibly!
Do you love the outdoors?
Yep, us too. That's why we send you the best local adventures, stories, and expert advice, right to your inbox.


