
7 Essential Tips for Photographing the Milky Way
7 essential tips to help you take better pictures of the Milky Way on your next adventure.
1. Finding Dark Skies
The first step to photographing the Milky Way is finding a location where the skies are dark enough in order to be able to get a clear view of the Milky Way. One of the best resources I used is Dark Sky Finder. This website shows the light pollution in a given area. I always look at the area I will be visiting to see if it is even possible to photograph the Milky Way, or I look for new areas that have little to no light pollution.

2. Moon Phase
Next, I check the moon phase. The best time is to photograph the Milky Way is during a new moon. During a new moon, the stars and the Milky Way are clearly visible in the sky because the moonlight is not overpowering the dimmer stars, which includes the Milky Way. I also like to photograph the Milky Way during a crescent moon because the moonlight is just enough to illuminate the foreground but does not overpower the Milky Way. A few great apps I use to find the moon phase, when moon will be rising and setting along with the location of the moon in the sky at any given time for your location, are the Photo Pills and The Photographer's Ephemeris.

3. Finding the Milky Way
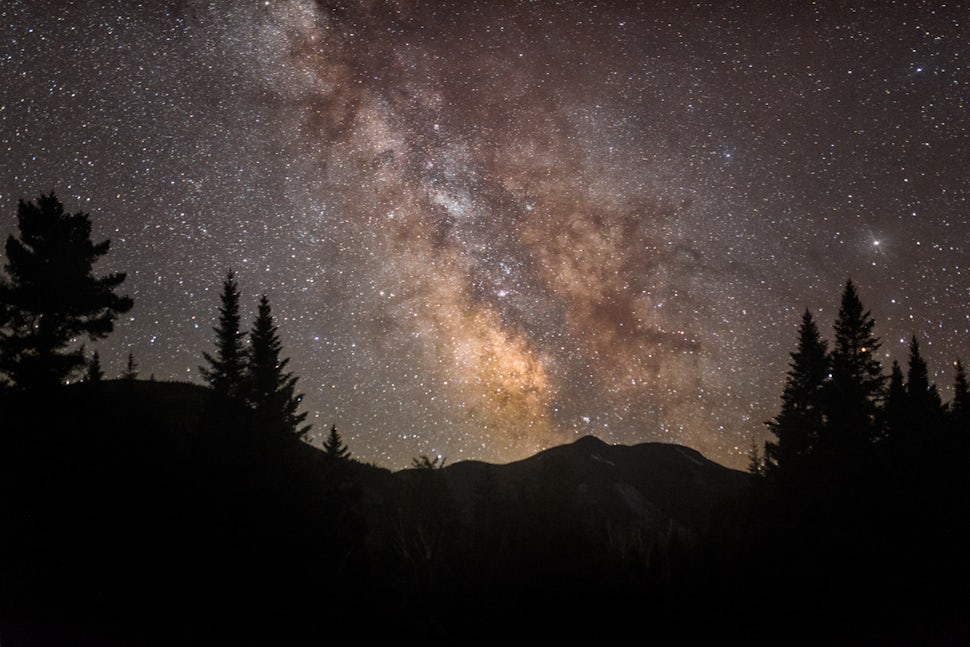
After checking the light pollution and the moon phase, I check for locations where I will be able to view the Milky Way. When most people talk about photographing the Milky Way, they are referring to the galactic core, which is the brightest part of the Milky Way. In the Northern Hemisphere, the galactic core is visible just before sunrise along the horizon starting in late March until just after sunset in late-October. The best months to view the core of the Milky Way are usually between June and August when the core is higher in the sky and visible for most of the night. The core is located next to the constellation Sagittarius, which looks like a tea pot, and the core runs from the spout of the tea pot past the top of the pot. The Milky Way will rise in the southeast and set in the southwest, which makes choosing a southern view the best for photographing the core. To the naked eye, the Milky Way looks like a faint cloud in the night sky.

4. Gear
The camera gear required to photograph the Milky Way is a camera with high ISO capabilities, a fast, wide angle lens, and a tripod. Most modern DSLR/Mirrorless cameras can photograph at high ISO. I usually set my camera at ISO 3200 and adjust it from there as needed. Fast glass (lens) refers to the maximum aperture of the lens. The lower the number F/1.4, F/1.8, F/2.8, F/4 etc. the larger the aperture, resulting in more light being able to pass through your lens to your camera sensor. To photograph the Milky Way, an F/2.8 or faster lens is optimal, but it is possible to use a F/4 lens if it is a very dark area on a moonless night. A wide angle lens 35mm or wider is required to be able to use longer shutter speeds without creating star trails. The wider your focal length, the longer your shutter can be open; the faster your lens, the more light your camera will be able to capture while your shutter is open, resulting in brighter stars and a clearer, more detailed Milky Way image. The last required gear is a sturdy tripod. A tripod is required to prevent your camera from moving during the long exposes required to photograph the Milky Way. Any movement, no matter how slight, will ruin your image, making it unusable.

5. 500 Rule
What is the 500 rule? The 500 rule is 500 divided by your focal length, which will give you the longest your cameras shutter can be open without getting movement in the stars, also known as star trails. For example, if I were photographing the Milky Way at 16mm I would take 500/16mm = 31.25 or 31 seconds. This means at 16mm, I could use a shutter speed of 31 seconds and still have tack sharp stars in my image. If I were to use the focal length of 35mm, it would be 500/35mm = 14.28 or 14 seconds. This is why using a fast wide angle lens is ideal because at wider the focal length, you are able to take advantage of longer shutter speeds. Just remember that if you are using a crop sensor camera, you must multiply your focal length by the crop. For most Nikon and Sony cameras, it’s a 1.5x crop factor, and for most Canons it’s a 1.6x crop factor. This means if I were using a Nikon D7200 at 16mm, I would multiply 16mm X 1.5 = 24mm to adjust for the crop and then use the rule of 500, 500/24mm = 20.8 s or 20 seconds.

6. Focusing in the Dark
Focusing at night can be difficult the first few times you do it, but making sure your lens is focused properly is very important. Usually the first thing people notice is auto focus will not work, so some people believe they can just turn off auto focus and set their camera to infinity, but this is not always the case. Many factors have an effect on your lens, including the temperature, which is why most lenses are able to focus past infinity. The best way to focus once it is already dark is to first turn off auto focus on your lens and/or camera. Then turn on your camera’s live view mode, and look for the brightest star on your camera’s LCD screen. Zoom into that bright star on your LCD screen until it is a large dot on your screen. Next, slowly rotate your lens focus ring until the star becomes the smallest pinpoint possible. If you rotate your focus ring too far, the star will start to appear larger, so slowly rotate your focus ring back until the star returns to its smallest pinpoint possible. Once this is done, I look at my lens, and it should be at or near the lens infinity mark. Lastly, I take a test image and then zoom in on the image to check my exposure, to make sure I do not have any star trails, and to make sure everything is tack sharp. Once I am happy with everything, as an added safety measure, I take a piece of gaffers tape and CAREFULLY tape my focus ring in place to prevent it from accidentally getting bumped during the course of the night.

7. Composition
Even though the Milky Way will be the main element in your image, it shouldn’t be the only element in your image. Remember to add interesting elements to help tell the story of your location. For more photography composition techniques, click here.

We want to acknowledge and thank the past, present, and future generations of all Native Nations and Indigenous Peoples whose ancestral lands we travel, explore, and play on. Always practice Leave No Trace ethics on your adventures and follow local regulations. Please explore responsibly!
Do you love the outdoors?
Yep, us too. That's why we send you the best local adventures, stories, and expert advice, right to your inbox.


