
10 Tips For Your Everest Base Camp Trek
The Everest Base Camp trek isn't easy but I can promise that it'll be well worth the effort. These are some of the things that I wish I knew before I went:
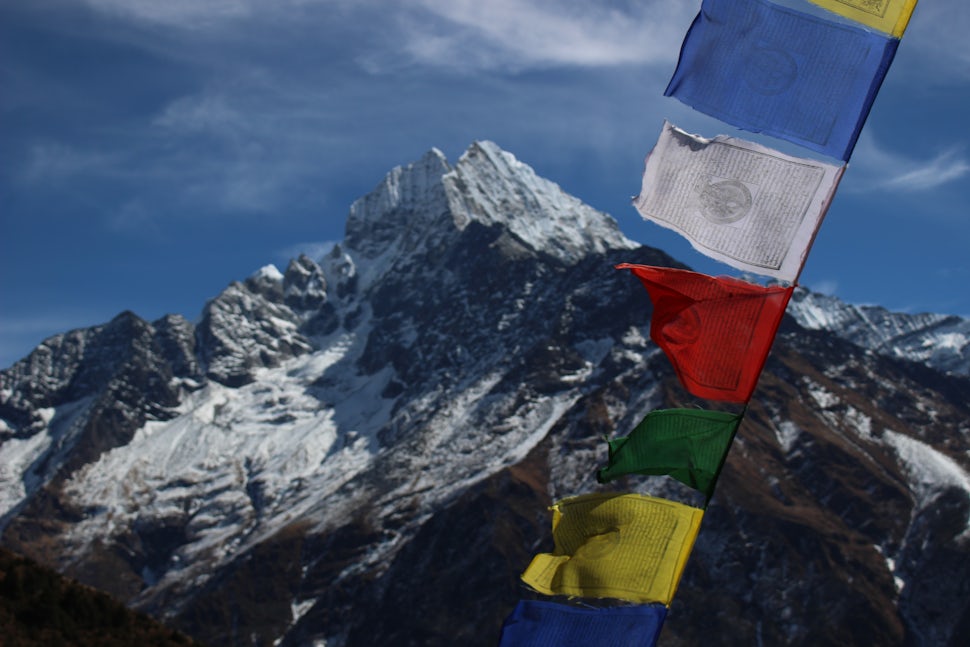
Everest Base Camp had always been high on my list of to-do's, I dreamt of actually climbing Everest but thought base camp might be a good first step. Even when I was dying climbing straight up hill, the views made this trek so worth it. It's a pretty surreal feeling being above 17,000 ft and looking around at mountains still towering thousands of feet above you. Before I went I had tried to read up on the trek so I'd have a better idea of what I was in for but found quite a bit of conflicting information. So, here are some tips I wish I had known before I went and I hope they help you prepare for your trek!
1. Try to Go on the Edges of the Off Season
The only time I could do the trek was over the Nepali winter and I had countless friends and sources online telling me that it wouldn't be possible to do the trek until March at the earliest. However, I found a couple posts online saying that it would be doable, just cold and so I went ahead and booked my trip. I truly could not have been happier with my decision. The weather was absolutely beautiful during the day and yeah it got cold at night but you just have to come prepared with warm clothing. The other huge benefit to going at this time of year is that the trails are fairly empty which will definitely not happen during the high season. There were a couple days where we only saw a few other trekkers. Additionally, the teahouses will be much emptier and you can stay in many of them for free if you buy enough food there. While the weather may be slightly nicer during high season, the perks of off season are too good to pass up. The one time of year I wouldn't recommend going is over the summer when its monsoon season as you likely won't get the best views.

2. Decide if you Want to go With a Group/Guide
There are several ways that you can trek up to Everest Base Camp: you can go with an organized group, hire a guide and/or porters for you and your group, or do it on your own. I went with an organized group because I was traveling solo and had limited time and wanted to have a definite plan before I got there. I enjoyed traveling with a group because I made a lot of great friends and got to spend every day on the trail with them. It was also nice having all the teahouses booked ahead of time. The main downsides were that we often had to go slow to accommodate all team members and it was much pricier than the other two options. Hiring a guide and/or porters is a great option because you are still supporting the local economy and have someone there who can show you the way and teach you about the area. It is very possible to carry your own backpack and just hire one guide. The trail is also very straight forward so it's possible to do the trail on your own. This is clearly the cheapest option which is ideal if you're traveling on a tight budget. We met a group of four men doing the trek on their own and they said all they had to pay for was food at the lodges and got to stay for free. Each option has its pros and cons so you just have to decide what's best for you!
3. Pick an Itinerary with at least 1 or 2 Acclimatization Days
Altitude is no joke. Countless people have needed to be helicoptered down or died from altitude related illnesses. The best way to avoid this is through taking acclimatization days and even then there's no guarantee you won't be affected by the altitude. Most treks have an acclimatization day in Namche Bazar and another in Dingboche which adds two days to the trek length but increases your chances of making it to the top. On these days you do a shorter hike to a higher elevation and then come back down to sleep for the night. Don't skip them!

4. Bring lots of Snacks
Bring snacks either from home or buy them in Kathmandu. You'll want them. One of the best feelings is lying down after a long day of trekking and eating a chocolate bar. While you can find many of these treats along the way they will be much more expensive than in Kathmandu. A snickers bar will cost around 75 cents in Kathmandu and $2-3 in Namche Bazar. Protein bars and candy were my two go-to's but bring whatever you think you'll want! However, if you run out of snacks, don't worry you'll still be able to find plenty along the way.
5. Bring Cash with you
There are some ATM's in Lukla and Namche Bazar but they charge crazy fees and so you're better off getting rupees out in Kathmandu. I used cash for every meal, snack, and tips for my guides and porters. I brought the equivalent of around $350 USD and used most of it throughout the 12 day trek. A couple people in my group used a bit less than this but most used more. I had the mindset that it was better to have more just in case and exchange it back to dollars if need be after the trek. You'll want to stop for breaks and treat yourself every once in a while so make sure you bring enough cash to do so!
6. Bring a Camera
This would seem like an obvious point but around half the people on my trip didn't bring a camera with them. You will be blown away by the views every day and will want a way to capture it. I think I took nearly 2,000 photos and could have probably taken even more. The trick is to find a balance between being present and enjoying the views and also spending time capturing it in photos. But trust me, you'll not only want pictures to show off to your friends and family when you get home but also to keep as memory of your time.

7. Bring Extra Batteries/Charging Packs
In the cold, your batteries will die much quicker than they do at home. This holds true for basically every kind of electronic you'll be using from phones to cameras to kindles. While some of the tea houses allow you to charge things, they all charge you for it (some more than others). An easy way to avoid this is to bring spare batteries and a portable charger. I only brought one spare battery for my camera and one portable charger for my phone and kindle and never had to pay to charge my items once. I also slept with all my electronics in my sleeping bag to keep them warm at night, so who knows maybe that helped as well.
8. Bring a Card Deck, Book, and any Other Games you Like to Play
While you will spend some long days trekking, you will never get in to camp/your tea house any later than 4 or 5 pm. This leaves a lot of time open for activities and trust me, you'll want something to entertain you. I managed to read two or three books throughout the trek and spend countless hours playing card games with my group members. Some tea houses actually had board games to play but it was nice to have our own to entertain ourselves! There will be days where you just want to lay down and do nothing after trekking all day but it was always nice to have the option to do various activities.
9. Bring a Wide Variety of Clothing
I did this trek in the middle of winter and at times I was in a t-shirt and others I was wearing 4 fleece layers under my puffy jacket. Needless to say the temperatures vary greatly and can change quickly. It'll be blue skies and sunny one second and completely cloudy and cold 10 minutes later. The only way to be ready for this is if you have enough layers. You aren't going to be changing outfits every day so use the room in your backpack to bring clothing for all different temperatures that you can layer underneath one another. It's also nice to have trekking clothes and then "clean", warm clothes you can change into after you're done hiking for the day.

10. Pick up ALL Your Trash
This would also seem self explanatory but I came across so much trash along the way. Apparently the trash situation is much better than it used to be as there was a massive clean up after the 2015 earthquake. That being said, I was still surprised by how much trash there was on the trail. There are trashcans along the trail and at every rest stop so just keep your trash in your backpack until you can throw it away in a designated area! If you're feeling inspired, it's also pretty easy to pick up at least a couple of pieces of trash that others have left.
I hope these tips help when you're planning your trek and feel free to comment with any questions you may have! And ENJOY! This is the most breathtaking place I've ever been and I can't wait until the day I get to go back.


We want to acknowledge and thank the past, present, and future generations of all Native Nations and Indigenous Peoples whose ancestral lands we travel, explore, and play on. Always practice Leave No Trace ethics on your adventures and follow local regulations. Please explore responsibly!
Do you love the outdoors?
Yep, us too. That's why we send you the best local adventures, stories, and expert advice, right to your inbox.


